
Purlins are a type of constructional knot that is used to attach trusses. There are many different ways to attach a purlin to a truss, but the most common way is by using a bowline. To tie a bowline in a loop, you need two pieces of cord, each of which is tied around the middle of the other in an overhand knot. You then take the end of one cord and put it over the top of the bottom cord so that it’s underneath the top cord. In This Article, we will discuss how to attach purlins to trusses.
What is Purlin?
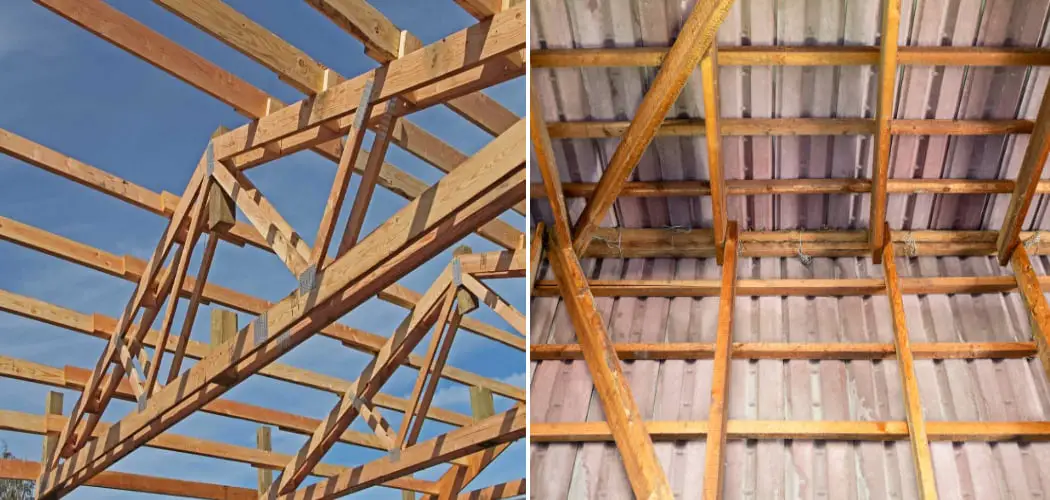
Purlin is a structural member of a building, typically a metal one, that is used to span the distance between two supports such as columns or walls. Purlins are commonly used in roof construction, where they are typically positioned horizontally and support the roofing material. You may also use them in other applications, such as in the framing of metal buildings.

Types of Purlin
There are different types of purlins that are commonly used in construction. The most common types are the C-purlin and the Z-purlin. The C-purlin is a horizontal beam used to support roofing sheets, while the Z-purlin is a vertical beam used to support the roof structure.

What is Truss?
A truss is a structure made of straight pieces of material, usually metal or wood, that are connected to form a triangle. The triangle is the strongest shape for a structure, and the truss takes advantage of that fact. Trusses are used in construction to create roof frames and other structures that need to be strong and lightweight.

Benefits of Attaching Purlins to Trusses
Purlins are typically attached to trusses in order to provide a lateral support system. This lateral support system is important because it helps keep the trusses in alignment, which prevents the roof from sagging. Additionally, attaching purlins to the trusses helps improve the roofing system’s overall performance by transferring the weight of the roofing materials more evenly across the surface of the roof. This article will provide the necessary steps required for attaching purlins to trusses.
Preparation
There are a few important preparation steps that need to take place before attaching purlins to trusses. The first step is to measure and mark the locations of the trusses on the purlins. This can be done using a tape measure and a pencil. Once the marks have been made, the purlins can be cut to size. After the purlins have been cut, they will need to be drilled with holes that correspond with the trusses’ locations.
How to Attach Purlins to Trusses?
If you are working with trusses, you will inevitably need to attach purlins. There are a few different ways to do this, and the one you choose depends on the type of truss and the size of the purlin.
One way to attach a purlin is to use wire staples. This is easiest if the purlin is small and the truss is large. Simply tack one end of the staple into the top edge of the purlin, then tack the other end into the bottom edge of the truss.
Another way to attach a purlin is with a grommet. This is best if the purlin is large and if there are several purlins attached to one truss. Drill a hole at both ends of every purlin, then insert a grommet through both holes.
You can also attach purlins to trusses by using bolts and washers. First, measure and mark the spots where you will be attaching the purlins to the trusses. Then, pre-drill the holes in the purlins and the trusses. Finally, insert the bolts and tighten them down.
How to Attach Purlins to Rafters?
Purlins are a type of bracket that you can use to attach rafters to a roof. They come in various shapes and sizes, so it is important to choose the right one for the job. The most common way to attach a purlin is with screws, but they can also be attached with nails or adhesive. You can attach purlins to the edges of a rafter by using screws or nails. To use screws, measure and mark the spot where you will be attaching the purlin to the rafter. Then, drill a hole into the rafter and insert it into the hole.
How Far Apart Do Trusses Need to Be?
The spacing between trusses is typically based on the engineer’s loading analysis and span calculation. In general, the trusses should be spaced far enough apart so that the design live load on the members is not exceeded. The exact distance will vary depending on the truss type, the materials used, and other factors.

How to Install Purlins?
To install purlins, start by measuring the length and width of the area where they will be installed. Use a saw to cut purlin to size, then use the drill to drill pilot holes into the rafters. Insert the purlins into the pilot holes, and secure them with screws. Please make sure the purlins are evenly spaced and that there is at least a two-inch gap between them and the roofing material.

How Do I Support Purlins?
There are a few ways to support purlins – one is to use metal straps or hangers that wrap around the purlin and are attached to the rafters, and another is to use a wooden bracket that fits over the purlin and is nailed or screwed into place. In some cases, the purlin may be attached directly to the rafters without any additional support.
How Do You Fix Purlins Spacing?
The spacing of purlins is typically determined by the span of the roof and the weight of the roofing material. The purlins are spaced at intervals that will provide adequate support for the roofing material and will also be consistent with the structural requirements of the roof. In some cases, the spacing of the purlins may need to be adjusted in order to accommodate specific roofing materials or to ensure that the purlins are properly aligned.
There are a few ways to fix purlins spacing, the most common is to use a spacer. A spacer is a metal or wood bar placed between the purlins to create the desired spacing. Another way to fix the spacing is by using washers. Washers are placed on bolts before they are fitted into position. The washers will add space between the purlins and create the desired spacing.
Tips
A few tips should be followed when attaching purlins to trusses. One is to make sure that the purlins are level, and another is to use plenty of nails or screws to secure them in place. Additionally, it is important to stagger the joints between the purlins and the trusses and to make sure that the purlins are not too close to the end of the trusses.
Precautions
To attach purlins to trusses, using proper fasteners is important and take precautions to ensure that the connections are strong. First, the purlins should be aligned with the trusses to be perpendicular to the rafters. Then, it would be best if you used the appropriate fasteners to attach the purlins to the trusses. In most cases, this will require either screws or nails, depending on the materials used.
Conclusion
In conclusion, attaching purlins to trusses is a relatively simple process that can be completed in a short amount of time. By following the steps outlined in this article, you can ensure that your purlins are properly attached, and your trusses are stabilized.
Related Questions People Also Ask Which You May Find Useful
What Is the Difference Between a Purlin and a Joist?
Purlins are structural members that span the length of a roof perpendicular to the rafters. Typically, they are made of metal or wood. And support the roof decking and sheathing. Joists are also structural members that span the length of a floor, but they run parallel to the walls. They are typically made from timber or steel and support the flooring boards.
What Are the Dimensions of a Purlin?
Purlin dimensions are typically expressed in terms of the flange width, web thickness, and overall length. The flange width is the distance from one side of the purlin to the other, the web thickness is the distance from the top of the purlin to the bottom, and the overall length is the distance from one end of the purlin to the other.
What Is a Truss-end Cap?
A truss-end cap is a structural component that is used to connect the ends of two adjacent trusses. It is typically made out of metal or wood, and it helps to reinforce the joint between the two trusses. The end cap also helps to distribute the weight of the roof or structure evenly across the two trusses.
What Is the Weight Capacity of These Purlins?
The weight capacity of these purlins is unknown, as the manufacturer has not specified this information. Purlins are typically designed to withstand a certain amount of weight based on their size and material. However, it is important to consult with a professional before installing any purlins to ensure they are properly capable of supporting the anticipated load.
You May Also Find These Pages Useful
How to Attach Rafters to Ledger Boards
