
Removal of recessed lights without attic access can be challenging. The good news is that you can do it with a few simple tools and a little bit of know-how. If you are like most homeowners, when you bought your home, there was a brand new construction recessed light in the ceiling. A few years later, you decide you want to change the light bulb but realize you can’t because you don’t have attic access. This article will show you how to remove new construction recessed lights without attic access.
What Is Recessed Light?
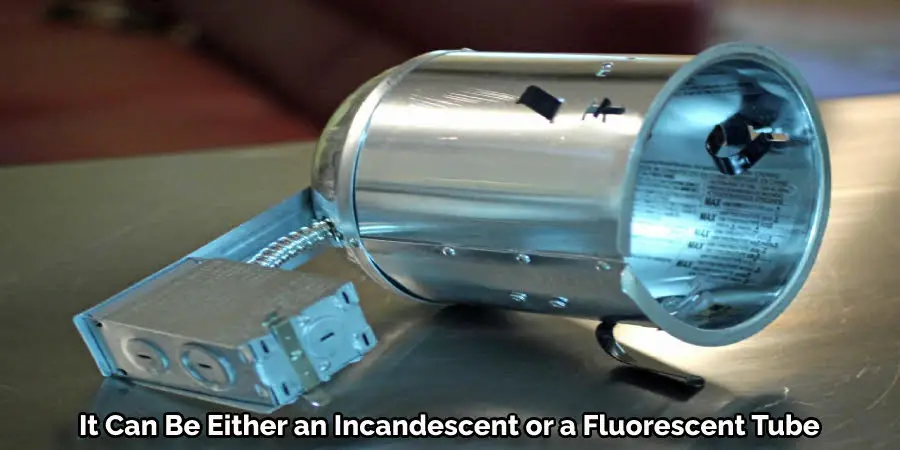
Recessed light fixtures are installed into the ceiling or wall, as opposed to being mounted on the surface. They typically have a trim or plate around the edge that sits flush with the surface and a housing that is recessed into the ceiling or wall. This housing contains the light fixture itself, which can be either an incandescent light bulb or a fluorescent tube.
Tools Needed
If you are a homeowner who is remodeling your home, or if you are moving into a new home that has recessed lighting installed in the ceiling, you may be wondering how to remove the recessed lights without attic access. It may not be easy, but this challenge is not impossible.
There are several devices available to assist you with the task at hand. The first tool that you will need is a drill. The second tool is a screwdriver. You will also need a flashlight and an extra set of hands to help you.
Planning
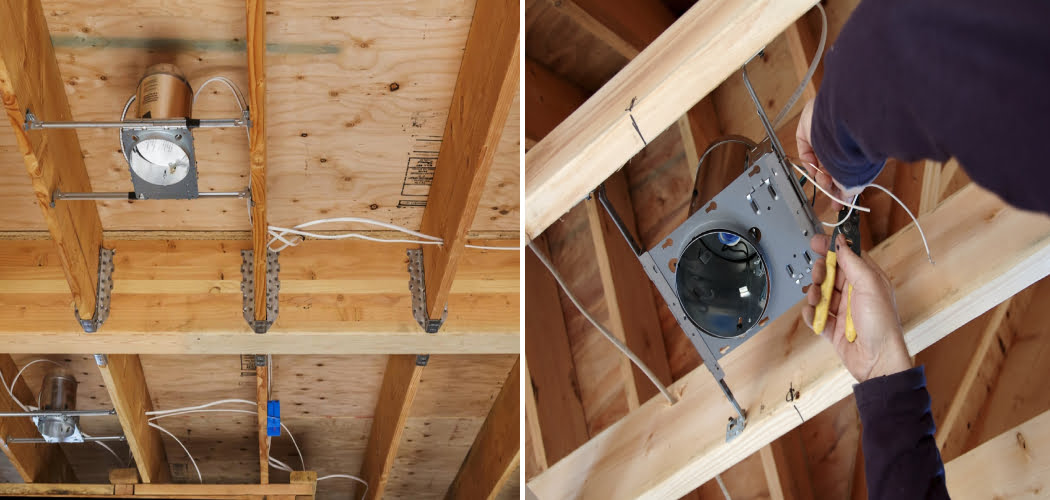
For Removing new construction recessed lights without attic access, you need to locate the light fixtures in the ceiling. Once the fixtures have been located, a hole needs to be cut in the surrounding drywall to gain access to the wiring and screws holding the fixture in place.
You need to disconnect the wiring and screws from the fixture. The fixture can then be lowered out of the hole and removed from the premises.
Preparation
Before removing a recessed light without attic access, You must take some preparatory steps. First, it is necessary to determine whether the light is wired to a switch or is controlled by a dimmer. If it is wired to a switch, you should turn the switch off before beginning work. If the light is controlled by a dimmer, the dimmer should be turned all the way down before beginning work.
How To Remove New Construction Recessed Lights Without Attic Access
The following will explain how to remove new construction recessed lights without attic access. This is useful for those who want to change out their lightbulbs without having to go into the attic.
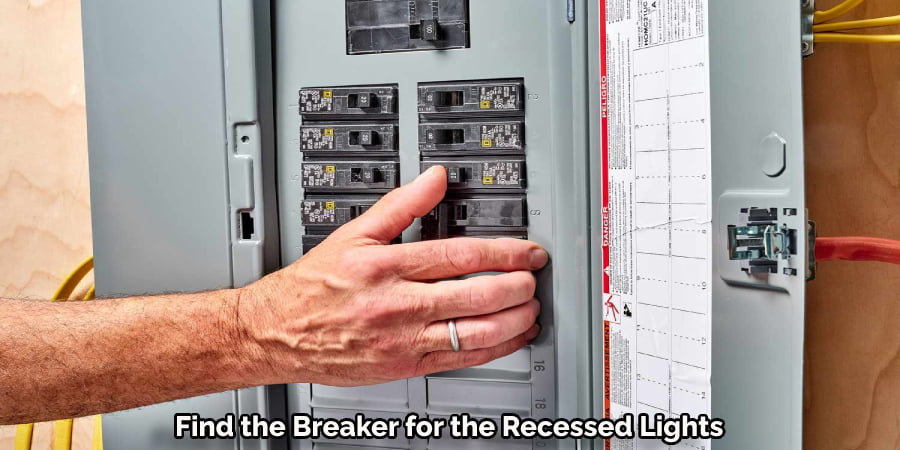
- First, you will need to find the circuit breaker that powers the light fixture. Once you have found the breaker, turn it off.
- Next, use a ladder to reach the light fixture.
Step 1: Finding The Breaker For The Recessed Lights
The builder will install recessed lights in the ceiling in many new construction homes. These lights are not accessible once the drywall is installed in some cases. If you need to change a light bulb or remove the light for any other reason, you will need to find the breaker for the recessed lights.
Step 2: Turning off the power to the recessed lights
There are two methods to disable a recessed light. One technique is to use a power cutoff switch for that specific circuit. The second way of turning off the power is by unscrewing the light bulb and removing it from the fixture.
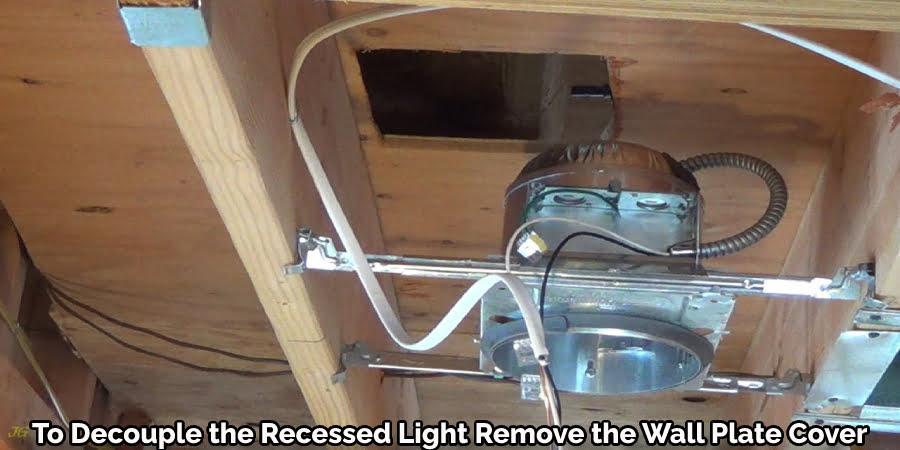
Step 3: Removing the cover of the light fixture
To decouple a new recessed light bulb installation without an attic, one should remove the wall plate cover. The fixture is typically held in place by two screws at the top. When all the screws are removed, you can separate the cover from the light.
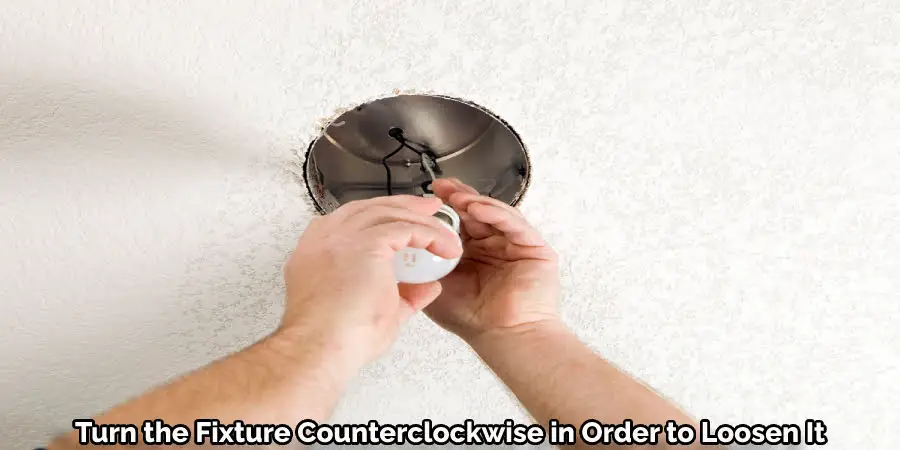
Step 4: Removing the bulbs from the light fixture
To remove old construction recessed lights, one must unscrew the bulb from the light fixture. To do so, turn the fixture counterclockwise in order to loosen it. The bulb is attached with a special wire and can easily be removed.
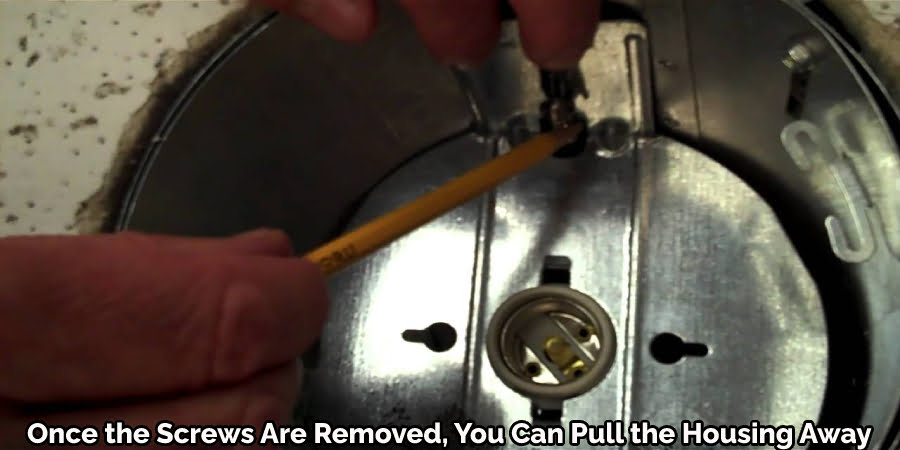
Step 5: Removing the recessed light housing
The recessed light housing is typically mounted to a ceiling joist or beam. It is usually secured with screws and nails. Once the screws are removed, you can easily pull the housing away from the ceiling.
Step 6: Removing The Wires From The Recessed Light Housing
Removing wires from a recessed light housing can be a complex task. You must first remove the cover of the heavy housing. You can achieve that simply by unscrewing the case. Once the cover is off, the wires will be visible. There may be a few different ways to disconnect the wires, but most likely, there will be screws or wire connectors that need to be removed. Once the wires are disconnected, you can remove the housing from the ceiling.
How To Rewire Recessed Lighting
When a light fixture goes out, it can be re-installed by following these simple steps: First, remove the old fixture by unscrewing the screws that hold it in place. Next, connect wires from the new fixture to the corresponding wires on the electrical box. Finally, screw the new fixture in place and re-attach the light bulb.
Tips and Tricks
There are a few things that you can do in order to remove recessed lights without attic access. One option is to use a stepladder to reach the light and unscrew it from the ceiling. Another option is to use a long pole or broom handle to reach up and twist the light out of the socket.
Precaution
One should take care when removing a recessed light that is not accessible from the attic. This is because there is a risk of electrical shock if the light is not properly disconnected from the wiring. One way to avoid this danger is to use a voltage detector to make sure the power is off before beginning any work.
How To Remove Recessed Lighting Clips
Removing recessed lighting clips can be a difficult task. The clips are often buried deep in the ceiling and can be difficult to reach. To remove the clips, you will need a ladder, a screwdriver, and a pair of pliers. First, climb up the ladder and locate the clips. Then, remove the screws that hold the clipping in place using a screwdriver.
Finally, use the pliers to pull the clip out of the ceiling.
How To Remove Recessed Light Can
Removing a recessed light can is a relatively simple process. First, shut off the electricity to the light fixture by turning off the circuit breaker in the wall. Next, remove the trim around the light. This is usually done by prying it off with a screwdriver. Once the trim is removed, unscrew the retaining screws that hold the light in place and pull it out. Be careful not to touch the bulb while it’s hot.
How To Change Bulb in Halo Recessed Light
To change a bulb in a recessed halo light, one must remove the housing unit. This is done by unscrewing the two screws on the side of the light. Once the housing unit is off, the old bulb can be removed, and the new bulb can be inserted. The new bulb should be screwed in tightly, and then the housing unit can be replaced and screwed in place.
Conclusion
In conclusion, there are a few different ways of removing new construction recessed lights without attic access. If you need a hole saw, you can use a drill to cut through the entrance from the outside. If you have a stepladder, you can remove the cover and unscrew the light from the inside. Finally, if you have a friend who is willing to help, you can use the fishing line method. Whichever method you choose, be sure to take precautions and be safe.
Frequently Asked Related Questions
How to Cover Up Recessed Lighting Holes?
If you have holes in your ceiling that light doesn’t seem to come through as well as it used to, don’t worry, there’s a solution! You can buy a special cover for your recessed lights that will hide the hole and make the light look like it’s coming from the ceiling once again.
How to Change Bulbs in Recessed Lighting?
Changing a lightbulb in recessed lighting can be a tricky task. First, remove the housing cover by unscrewing it counterclockwise. Then, locate the lightbulb and remove it by unscrewing it clockwise. Be sure to hold onto the lightbulb while unscrewing it, as they tend to get hot. Once the old lightbulb is removed, insert the new one and screw it in place clockwise.
How to Remove Inset Ceiling Lights?
Removing an inset ceiling light is a process that can be completed by anyone with basic DIY skills. The first step is to identify the light’s electrical box, which is typically located in the center of the light. Once the box is located, remove the cover using a screwdriver. Next, disconnect the light’s wiring by unscrewing the connectors. Finally, carefully lift the light out of the ceiling and set it aside.
You May Also Find These Pages Useful
How to Remove Old Recessed Light Housing
How To Hang Lights Outside Without Outlet